Creating Fillable Forms
Creating Fillable Forms — Everyone uses a form, whether it is a doctor's form, or an insurance form, or a credit form or a school registration form. Form creating is both an art and science. You want a form to be readable, convey the required information and be understandable. We also want forms, if they are online, to be fillable, with fields that invite the applicant to simply click and type in the information requested. Three programs that I use to create forms are the Adobe InDesign layout program, Acrobat, and Google Forms. Each has their strengths and weaknesses.
InDesign Form Making — InDesign provides a path in the program for creating forms in their Button and Forms library. This is found in Windows > Interactive > Buttons and Forms which has form elements that you can use in designing your form. You can add simple form elements such as text fields, radio buttons, check boxes or signatures. You can also add actions to submit the form by email or print.
Solid strokes and fills to the form fields, on/off hover states for buttons, check boxes and radio buttons can be added. You can specify font and font sizes in text input fields. You can then export this simple form to Adobe Acrobat for additional editing. See Adobe's Help Index on forms for more information.
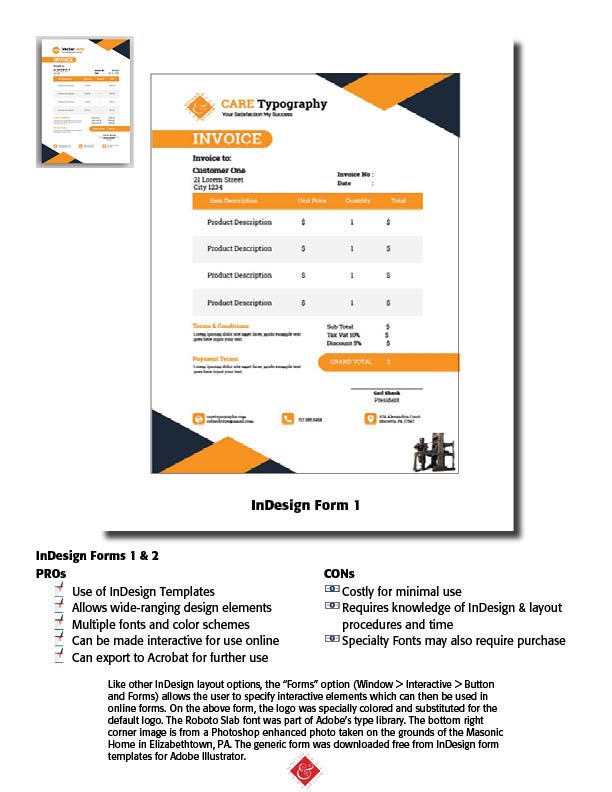
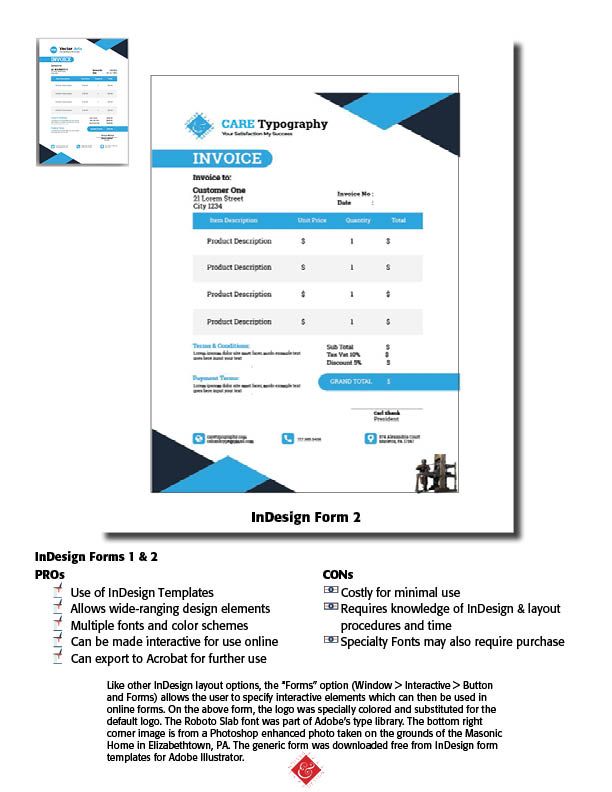
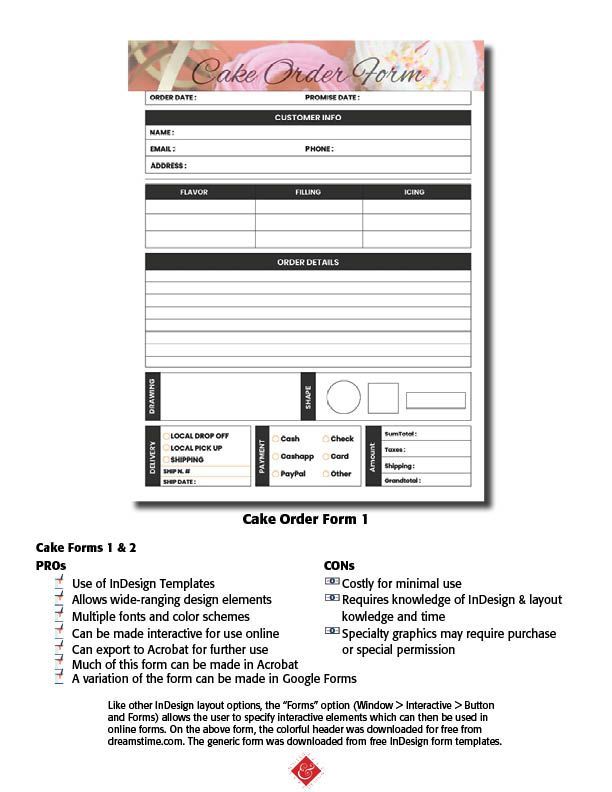
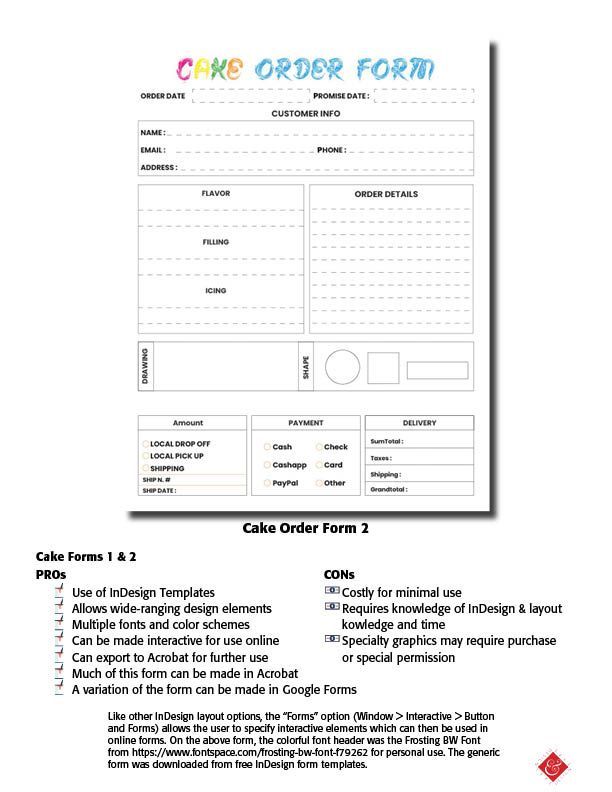
What is not told is that you must actually create the form and then add the buttons and field boxes and so forth. Here a very helpful tool is to use InDesign Form Templates, which professional designers have provided for our use. These are beautifully constructed forms that can be opened in Adobe Illustrator and used in programs like InDesign. I have included four downloaded forms below to show you the capabilities of such designed elements.
The advantages of using a high end program like InDesign are many for form creation. Like any other professional layout program, InDesign has all the bells and whistles that you need to design a form of your liking. Its myriad font selections, color selections, design elements and so forth will help you create an attractive and eye-catching form that is unlike many of the standard line forms you have seen. Many people also use Adobe Illustrator for form creation as well. The Form templates offered by Brand Packs are visually compelling and created for everything from registration forms to medical forms. Note the examples below.
The disadvantages are also to be noted. InDesign and the Forms Templates are not cheap. The InDesign program itself comes usually as part of the package of Creative Cloud from Adobe and costs over $50 per month for a subscription, which is the only way the current InDesign program is available. You cannot buy a current stand-alone InDesign program. The last stand alone program was in the CS series, InDesign CS 6, which is not available from Adobe any more. Form Templates created for Adobe Creative Cloud are also available for a price, brand packs.com offer seventeen outstanding InDesign compatible forms. They are available in the Adobe Stock program for a monthly fee of $30 – $200 per month, which includes not merely forms but all of the Adobe assets. One time users can retrieve five professionally made forms for $50 up to 150 forms and other assets for whopping price of $1,200. This fee is in addition to the regular Creative Cloud program fee. Additionally, extra type styles which may not be available from Adobe or in the default program can be costly, since using these fonts come with licenses for which often you pay a fee.
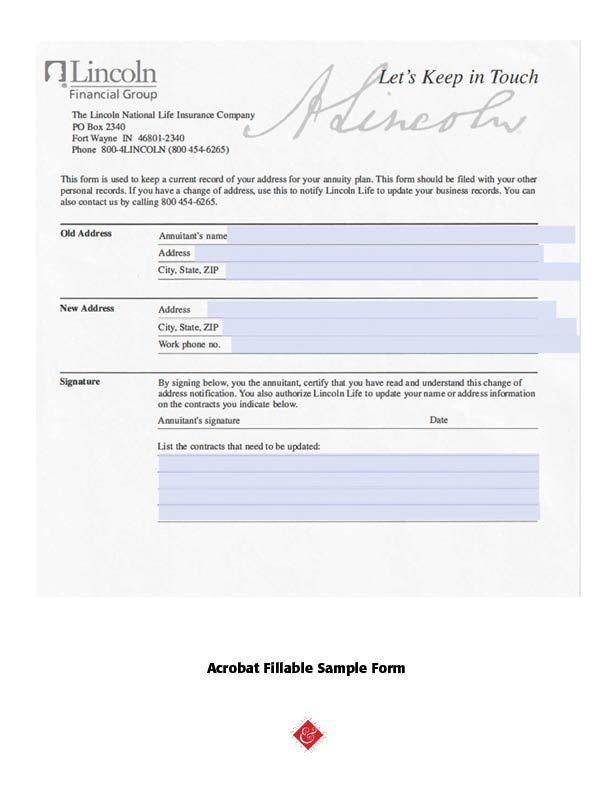
Acrobat Forms — One of the most used programs for creating forms is Adobe Acrobat. Editable PDF forms are available using Acrobat to securely secure data from customers and clients, vendors and more. Using Acrobat's "tool bar," fillable form fields, text fields, drop down menus, checkboxes and signature fields are available. You can either download a paper form from your scanner or from a file on your computer. Acrobat then adds fillable form fields which you can then distribute. (See Sample Below)
The steps are fairly easy —
- Open Acrobat:
Click on the “Tools” tab and select “Prepare Form.” - Select a file or scan a document:
Acrobat will automatically analyze your document and add form fields. - Add new form fields:
Use the top toolbar and adjust the layout using tools in the right pane. - Save your fillable PDF:
You can also share it with others or click Distribute to collect responses automatically.
See https://helpx.adobe.com/acrobat/using/create-form.html for more help.
However, unlike InDesign's or Illustrator's many layout elements, Acrobat depends on forms that have been already created for those professional touches.
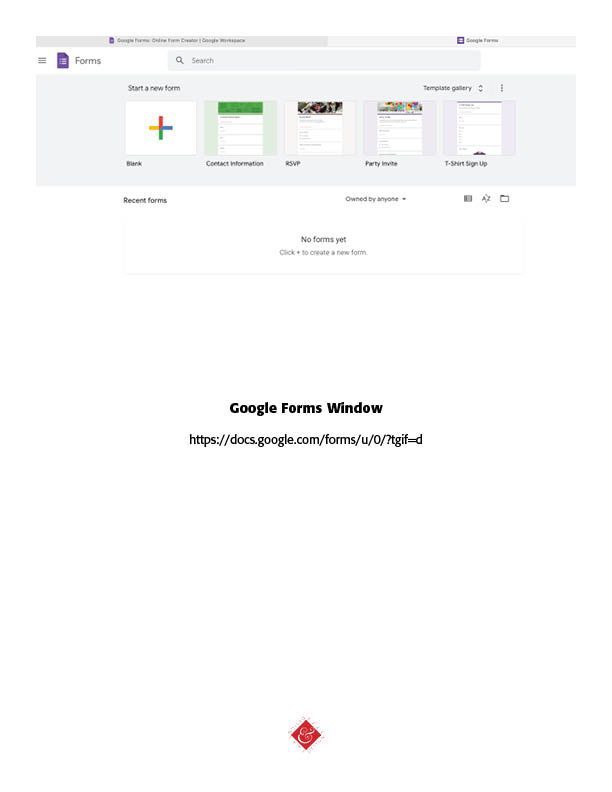
Google Forms — Certainly, one of the easiest and cheapest way to create and use a form is through Google Forms, available at forms.google.com or your Google Drive. Many users have Google Drive enabled on their computers. There are a few Form Templates offered. (See Illustration below).
- Step 1: Go to forms.google.com or Google Drive.
- Step 2: Select a template.
- Step 3: Change the title of your form.
- Step 4: Adjust questions and answers.
- Step 5: Customize the Google Form theme.
- Step 6: Preview your form.
Google notes that you can add a header image and customize the color scheme and fonts used. Google offers this advice — "When you're done, simply click the Send button, and choose to send it via email (either a link to the form or the entire form embedded in an email), copy a link to share manually, or embed the form as HTML on your site. When the responses start trickling in, you can see them in a list of aggregated data or individually, along with a collection of charts appropriate to the question type. If you're a spreadsheet wizard, you can take this data to Google Sheets and look for deeper connections there.
In addition to that Sheets integration, you can also pre-fill a form to save your respondents some time, collaborate with others on your form, and browse a collection of add-ons on the Google Workspace Marketplace. Bonus: if your respondents are Google users, their progress will be saved on any given form for a month, so they can click away and come back to it later." (https://support.google.com/docs/answer/6281888?hl=en&co=GENIE.Platform%3DDesktop#zippy=%2Ccreate-a-form-from-google-drive)
Takeaways. As an avid InDesign user and typographer I tend toward using that platform for designing and using forms. Just to note that many of my colleagues use Adobe Illustrator, and that is all fine. I like the creative freedom, the outstanding visual appeal possible and the end results seen and appreciated. I understand, however, the cost may be prohibitive for some, and busy office professionals may simply want a quick and easy form for their company. Google Forms cannot be beat with Adobe Acrobat coming in a close second. Take a look at the included forms below to get some ideas. If you would like CARE Typography to design your next form, let us know at cshanktype@gmail.com. We would be happy to quote you a price and offer a quick no-hassle turnaround.
Successful Layout & Design